
Mordite Press is playing through Shane King’s adventure Floating Castle Ardmor, which is available for free under the Dungeoneers license. The adventure is still in its “alpha” playtesting phase, so this isn’t so much a review as an actual play example. What’s more, I take liberties any time I run a module, so there are critical differences between the game I ran and the module as presented. That said, spoilers abound! If you plan on being a player in this module in the future, you should send this post to your GM and stop reading here.
The Party
Our party consists of four regulars from our Monday night crew: Jim, Matt, Michael, Paul. The characters are:
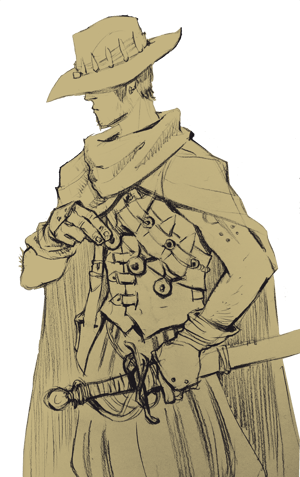
Lagos the Assassin, played by Paul
Lagos hails from an extremely remote realm called Nexxis which lies beyond Barbaria. The wreckage of a flying vessel has exposed that region to strange technologies unknown to the rest of the world. (This was a playtest of Jared Sorensen’s sci-fi hack The Last Days of Man.) He is studying alchemy using the unique knowledge of his homeland in the hopes of building some elementary firearms.
As an assassin, Lagos pays homage to the Lords of Vengeance and Retribution. This is manifested in his belief “As an offering to the Lords of Vengeance and Retribution, some folks just gotta die.” Lagos is a tough-talking cowboy with a strange code of honor that makes him a dangerous man.
The Assassin class is found in Wanderers, Outcasts, and Exiles.
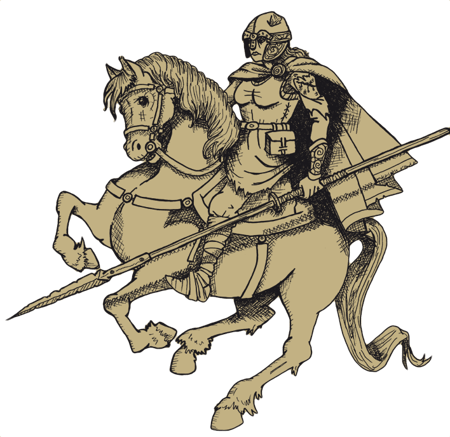 Olga the Cavalier, played by Matt
Olga lives again! Once thought to be buried in the collapse of the temple of Andreost, Olga was sustained and revived by the whispering of the Crown of Tesh Naga. The crown, it seems, has its own plans for the notoriously ambitious (if disenfranchised) noble lady. Olga has just paid the Terrible Price.
In her previous adventures, Olga was arrogant but not unsuccessful at claiming credit for leading the party and appointing everyone she encounters to her royal entourage. Her belief is “I will lead these revolting peasants to glory!”
The cavalier is a playtest class that will be featured in an upcoming Mordite Press release, The Vagrant’s Guide to Surviving the Wild. It notably includes a mount. Olga’s mount is named Privilege.
Orrin the Magician, played by Michael
A young mage whose initial dabblings caused great harm to his hometown, Orrin has struck out on his own search of fortune and knowledge. Perhaps because of his youthful mistakes, Orrin has proved to be pragmatic and cautious in his methods. A harrowing experience in the dread crypt of Skogenby left him wary of those who value power above all else.
Orrin’s belief is: “Those not favored by Kings and Gods must look out for each other." He is accompanied by his trusted donkey, Stone.
Reteri the Sea-elf Mariner, played by Jim
Reteri is destined for great things. Boisterous and proud, he always has a tale to tell and a song on his lips. He carries an ornate lute found in a previous excursion and has recruited several porters and hirelings from enemy forces over time. He favors the trident and net, the weapons of his people, which have aided him in capturing and sparing the lives of foes. Two such foes accompany him now as porters: Uddi and Hyron.
Reteri’s Belief is: “Tales worth telling come from bold, courageous deeds.”
The Sea-elf Mariner class is found in Wanderers, Outcasts, and Exiles.
Session 1: Lagos, Olga, Orrin, Reteri
All four characters are with us for the first session.
Town Phase in Orzid
Fleeing the ice-bound port of Torvig over a matter of a stolen (“borrowed”) boat, the party has come to follow rumors that Ardmor, a legendary flying castle has been spotted near the temples of Orzid.
As the ship nears the temple city, they observe a terrible dust storm has buried everything under a caked layer of sand. As they disembark, they are greeted by Petyr who explains to them that an offering to the sea gods is necessary by law, and he takes note of Reteri’s worth as an elf.
Since they are in need of basic supplies (and a town phase for recovery) before heading out again, they decide to pitch in and help with the cleanup to get the necessary market stalls up and running. (I loved this idea in the module, and it worked really well in practice.)
Orrin takes some time to research the Lordrek Forest and create a map, which will be a useful tool on the coming journey. In the library, he meets the scholar Serah and receives her assistance researching Ardmor.
 Lagos is contacted by agents within the cult of the Lords of Vengeance. Orzid is a city of many temples, but the Vengeance cult does not operate openly. Instead, they serve at the need of other temples in the city. The cultist of Vengeance tells Lagos:
“Recently, some craven thieves robbed the Temple of the Burning Lord. Rumor tells that they were fortune seekers looking for supplies to make their own bid to loot the flying castle, which is said to be floating over the forest of Lordrek toward Mordeth at a slow pace. The Lords of Vengeance and Retribution call for a champion to recover the stolen oils and lanterns; or failing that, see the thieves punished.”
Lagos decides to visit the Temple of the Burning Lord to investigate further. While there, he prays at the temple and receives the favor of the Burning Lord. (Rolled a 12 on the prayer table, and so gains +1D to matters under the provenance of the Burning Lord, e.g. fire and sunlight. A very good result, as you shall see.) The priests exalt Lagos as a champion and encourage him to do works in the name of the Burning Lord.
Adventure Phase — Expedition to Castle Ardmor
The castle was last spotted in the Lordrek Forest, which is four days north along the Giant’s Road. I took this opportunity to playtest a new conflict type, the Expedition, which is featured at length in the upcoming Vagrant’s Guide. I set a goal to use only the things mentioned in the module for this expedition, but, as luck would have it, Shane wrote more than enough for me to go on.
Turn 1: Expedition Conflict
For Expeditions, the GM’s disposition is set by the number of days to travel, and it is assigned to individual Territories, which are a bit like monsters in a fight conflict. In this case, The Giant’s Road Territory has four disposition (four days travel), and the Lordrek Forest Territory has another four, for a total of 8.
Next, the players need to generate their disposition, which reflects the supplies they need to keep moving. Leaving from town, Olga rolls Resources and adds to her base of Health. She takes help from all of the players who describe how they are preparing for the journey — Reteri, for instance, helps by securing the supplies with Laborer. Being paranoid, the Olga sinks some Persona into tapping her Nature to order the others around (Demanding) as they make ready. In the end, the party ends up with 11 successes, which should be more than enough to reach the castle in good shape.
Round 1 (Party M/A/A vs. Giant’s Road A/A/M)
As the conflict begins, the party strikes out from Orzid along the Giant’s Road. The GM announces the first Threat, which is something like a weapon used by a monster in a fight conflict. The Threat is “Paladin Initiates” — returning to Orzid from battlefields to the North. (Threats held in reserve for later rounds include: Morthrak Orcs, Wagons pile with the dead, and a resurgent Dust Storm.)
Action 1, Maneuver vs. Attack: The initiates are hungry and beg the party for additional supplies. The party attempts to go around them to avoid losing time (and supplies). The party rolls well and chooses the Gain Position option for a +2D on the next action.
Action 2, Attack vs. Attack: The Territory deals three points of damage with an Attack; they consume some of their supplies as expected and maybe share some with the weary paladins on the road.
The party marches onward, trying to gain enough ground to put the paladin force behind them. With the bonus from the previous action, the party deals 4 successes — enough damage to pass into the next Territory. However, we only change position at the beginning of each round. Even though the Giant’s Road is out of hit points, this just means the party is making good time. They still roll against the Giant’s Road Territory for the third action.
Action 3, Attack vs. Maneuver: And the Giant’s Road rolls very well! A successful maneuver not only draws down the party’s attack but yields three additional successes for a disarm. A passing wagon laden with a dismantled siege engine splashes into a mud puddle. The mud splatters on Orrin’s map, ruining it!
Round 2 (Party A/A/A vs. Lordrek Forest’s A/D/A)
At the top of the round, the party has dealt enough damage to overcome the Giant’s Road Territory. They now pass into the Lordrek Forest. The GM announces the Threat for the round, which is a “Devil Boar.” I describe the telltale markings left by the Devil Boar’s tusks on the tree trunks as they move deeper into the forest. (OK, so Devil Boars don’t appear by name in the module, but they are awesome. I’m holding the Teeth of Morthrak, Pouring Rain, and Ancient Ruins threats in reserve for later rounds or expeditions).
Action 1, Attack vs. Attack: Feeling the end of the journey is in sight, the Lagos commits to a full-on attack with as many dice as he can muster, yielding another four successes. The GM’s Disposition is down to 1! At the same time, the Devil Boar emerges from the woods and rushes the party, dealing two points of damage. Additionally, the monstrous Devil Boar threat has a special power: if it deals damage via attack or feint, the enemy must also make a Fighter test or take the Injured Condition. Lagos does battle with the devil boar, fails the test, and takes the injured condition.
Action 2, Attack vs. Defend: With the Territory on the ropes at 1 disposition, the party knows they need to push this attack through. Defend actions played by the territory mean the party is stalled (or worse, lost or heading in the wrong direction!) They attempt to regroup and leave the Devil Boar behind them, but the battle has driven them off track, and they need to find their way through the forest.
Although the Forest of Lordrek puts up a couple of successes, the party overcomes, dealing the one damage needed to reach their destination. The Expedition conflict is over!
Compromise and Loot
In the end, the party had lost about half of their disposition when they reached their destination, for a moderate compromise. Consulting the compromise guidelines in the Vagrant’s playtest doc, we see that the territories are owed:
- Party is angry, afraid, or exhausted
- Cheap gear destroyed (Ob 1–3) or Expensive gear damaged (Ob 4+)
- Enemy arrives simultaneously
I chose to hand out the Exhausted condition, as pursuing the flying castle has been a tough crawl.
Olga and Orrin both have mounts (Privilege the Palfrey and the Stone the Donkey.) Instead of becoming Exhausted and losing Fresh, they choose to “Spur the Mount,” passing the condition on to their mount.
Additionally, the party collects Loot for overcoming the Devil Boar (and would also collect loot for the Paladin initiates if there was Loot listed, but there was none.) They collect four rolls on Loot Table 1 because this was a planned encounter.
Turn 2 (Adventure Phase)
In all the Expedition took about 90 minutes, and left the characters at their destination with a few conditions and a few stories to tell. It is still turn 2. The party crests a ridge and catches sight of the floating castle high above the forest, taking note of its general layout. They wonder how the heck they’re going to get up there!
Lagos decides to search the forest for any evidence of the thieves he is after. The GM deems that a Hunter test with Obstacle 2. Despite being Injured and Exhausted, the blessing of the Burning Lord shines through, and he passes the test! Not only does he find the small camp presumably left by the thieves, their trail joins with a much larger party that has been leaving a string of large campsites in the Lordrek Forest — the Company of the Swift Wing!
Olga’s Instinct
Just as the party hails the striders of the Swift Wing, who remained behind to guard the camp, Olga’s instinct kicks in: “Always deliver an impassioned speech when a crowd is present.” In this case, if she can pass a Convince Conflict against the assembled striders, she can win some of them over to her cause. (Normally I wouldn’t reach for a conflict so soon after the Expedition, but the Crown of Tesh Naga specifically mentions this conflict type, so I’m going to roll with it.)
Olga attempts to lean on her royal lineage to command the loyalty of these striders; except things don’t really go well for her in the conversation. The striders are (almost) wholly committed to their mission, and the conflict is over quickly. As the price of failure, the GM imposes a twist similar to the Enmity Clause: now that they know who she is, some of the striders are plotting to abduct her for ransom. But for now, they will bide their time.
Turn 3
These goings on are interrupted by the return of the main force of the Swift Wing, as night has fallen. They arrive in camp and confront the newcomers. Lagos steps up and attempts to persuade their leader, Velkethyr, to aid them in reaching the floating castle. Though he resisted at first, the blessing of the Burning Lord aided him in persuading the elven wizard to allow them to join the company. Velkethyr warns that the castle is too dangerous to explore at night.
Camp Phase - Lordrek Forest
Still burdened with conditions from the journey and holding a few checks, the party decides to camp the night with the Swift Wing before the ascent in the early morning. Recovery attempts are made, and a few succeed! We decide this is a good point to break for the night, and rewards are handed out.
Session 2: Olga, Orrin, Reteri
(Paul/Lagos couldn’t make it this session. It happens. Since we knew the session was going to take us up to the castle, we collectively agreed that Lagos was right there off-stage the whole time, and he would skulk off to his assassin business at the earliest plausible opportunity. )
Turn 1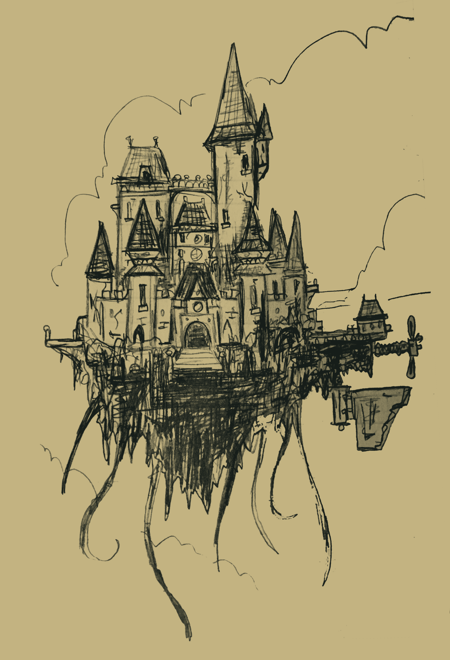
A strider of the Swift Wing comes to the party’s tent in the darkness before dawn. Velkethyr wants to catch the castle just as the sun rises to maximize their working time. He gives orders that the striders move the camp to a point in advance of the castle’s movement.
Riding on borrowed horses, Privilege, and Stone, the party closes in the dark with the castle. In the night they behold a different sight than they did the prior day — wispy tendrils in the thousands drifting down to the forest canopy, pulling distant objects up toward the castle. Most were too removed and dim to make out, but the largest appeared to be a whole deer, wriggling frantically as it was pulled skyward. “The castle feeds,” notes Velkethyr, ominously.
Soon the sun crests the Uldun range and strikes the castle, though the forest below remains dark for some time. As it does, the tendrils quickly shrink back to the mass of the castle. “Now!” orders Velkethyr and the company rides at full speed through a clear gulley toward the castle. Flinging a knotted, silvery cord into the air, the elven wizard sings an unearthly song that lifts the rope to the heavens and latches on to the castle. The party must make a Dungeoneer test to ascend the punishing height of the cord (and Rider may help.) The dice are kind.
Turn 2
They complete their ascent and clamber up onto a kind of scaffolding built around a massive, inert propeller. There is a hatch leading inside the bulk of the castle’s base, and the Swift Wing Striders waste no time taking up position on either side of the hatch with crossbows winched. The throw open the door and charge into the room beyond.
Once inside they produce long knives and light torches. They begin hacking at the thick, reddish pink vines that grow over every surface of the room. Some they burn, but other sections are hacked away whole and thrown out the hatch where they instantly disintegrate in the sunlight, leaving massive pluming trails of dust behind the castle. “The horror that dwells here is an enemy of the Burning Lord,” Velkethyr explains. “That is why it isn’t safe to remain at night.”
Once the striders have secured the room, Nell, the gnomish engineer is brought to the fore. She begins giving orders and setting up her alchemical apparatus. Velkethyr turns to the party.
“We must remain here and attempt to change the course of the ship. Though it is moving slow enough, if it continues along this path it will drift directly into the dread lands of Mordeth, where the evils dwell. The Council of Feudor fears what the powers of Chaos could do with such a vessel. You must explore within the castle proper and see if you can’t learn what this horror is that haunts it. Report back here before sundown, or we will be forced to consider you lost.”
The single passage leading out from this room is a barred gate that has somehow been pried apart by vines which intrude on the room. The hallway beyond is inlaid with gold, and there is no light. The party lights torches.
They pass down the hall into a great vaulted bay within the base of the castle. To either side are tower-like structures reaching to the height of the vault — one with a sealed doorway and two brutish statues, the other with a shattered door and overgrown by vines. Orrin approaches the vines and attempts to burn them with the torch when they suddenly spring into motion and grab him!
A Fighter test is needed to escape the grapple. While wrestling with the vegetation, Orrin catches sight of a human face — alive, though catatonic— nestled in the vines. With aid from his comrades, Orrin manages to break free, but the vines are now converging on the party!
Turn 3
In order to hack their way into the chamber, the party attempts to Drive Off the vine wraiths. They succeed in pushing the vines back far enough to enter the chamber proper, but Orrin is injured, and now their return path is cut off. They take notice of a broken lift mechanism and the sky-pier that leads out the far side of the chamber.
Turn 4 — GRIND
Orrin approaches the sealed door between the statues to check if it will open. As soon as he touches the door, the statues lurch into motion and force him back to the center of the chamber — guarding the door, but making no further aggressive moves.
The party decides to ascend the vine-covered stairway instead. They stop at the first landing and note that they are in the center of a domed room with paintings depicting an advanced society living among the clouds. There are many stairways leading out of the room, but Reteri quickly notes that the easterly stair leads to a sunlit colonnade heading back in the direction of the Pearl tower. Not one to hesitate, he marches off toward the Pearl Tower, imagining he might be able to gain entrance from the upper levels.
At the end of the collonade, the door into the Pearl Tower stands slightly open. The sounds of snorting and cruel laughter can be heard within. Olga tries tells Reteri to stop and listen, resulting in a failed Scout test — she is made Angry by Reteri’s insolence, and the room beyond the door falls silent.
The party bursts through the door hoping to gain the element of surprise. Inside is a parlor area with many benches and furnishings. The windows in this room would be admitting bright light, but scraps of cloth and carpet have been nailed into place, leaving only dim light. There are stairs in a column in the center of the room and on the far side, as well as other exits to the south and east.
They see a human priest wearing the robes of a devotee of the Burning Lord, cringing and holding his arms out warily. He has been forced to don a crude, foolish hat that makes him look ridiculous, and his robe is torn and stained with blood. Then, from behind the furnishings emerge wicked orcs, brandishing pole-arms: Wog, Thog, Krog and Greg. They move to attack the party.
Orrin’s Spell
Without hesitation, Orrin casts Thread of Friendship on Wog, who has a limited grasp of the common speech. Wog manages to hold the other orcs at bay for a moment, convincing them that he knows Orrin and maybe they can work together. The other orcs aren’t having it, and after a moment’s parley, one of them bashes Wog in the back of the skull with the haft of his pole-arm. Chaos ensues, but Wog is for the moment left out of the fight. (I actually rolled a Die of Fate to determine if Wog was they type to easily betray his comrades, but it came up 4, so I simply left him out of the fight. )
Turn 5
The battle is joined. Olga and Reteri feel strongly that the orcs must be killed, given their brutish treatment of the captive priest. They opt for a Kill Conflict. (Here my notes fail me. The next installment of this AP will have much more detailed conflicts. )
When the battle is over, the party is Exhausted but victorious with a moderate compromise. Wog emerges, still charmed, but one of the orcs (Greg) has escaped in an unknown direction.
Najee the Priest tells them woefully that he was en route to Orzid with a troop of paladin initiates. The last thing he remembers is being abducted by orcs in the night. Then he woke up here (he’s not even aware he’s aboard a floating castle) and was forced to repeatedly conjure the Lords of the Four Winds with a monstrous instrument in the upper levels of the Pearl Tower.
(At this point, it is getting late, and so we decide to break the session and do rewards.)
Session 3: Lagos, Olga, and Orrin
(This week Paul/Lagos returns, but it’s Jim/Reteri’s turn to miss a session. C’est la vie!)
Meanwhile
Lagos spent his time away from the party searching for evidence of the thieves he is tracking. He finds evidence of their passage and leaves warnings to terrorize them nearby before returning to the party. (He logs a Manipulator test).
Turn 6
In the aftermath of the battle, Orrin asks Wog what the orcs are doing in this place. Wog is enchanted and views Orrin as a trusted friend, but the orcs live in fear of their masters and Wog doesn’t fully trust the others in the party — just Orrin. Orrin pulls him aside and tries to earn his confidence with a Persuader test, but fails.
Wog realizes that his master is going to be angry and begins to panic. Still regarding Orrin as a trusted friend, he flees to save his own hide.
Turn 7
Meanwhile, Olga has been thinking: “Why do the vine wraiths not grow over the pearl tower? There must be some magic that keeps them at bay.” With a few swings of her flail and a stonemason test, she cracks off a chip of the pearlescent marble and pockets it.
Turn 8 — GRIND
The party is in rough shape now. Although they have rations and torches to last, conditions have racked up over the last few conflicts and tests, and they have earned two checks. They think it wise to return to the engine room and report back to Velkethyr.
To do so, they’ll need to find a way through the vine wraiths that block their route to the engine room. Olga tests her chip of enchanted stone on some of the vines, and though they react adversely to it, after a moment, they lash out at her. It’s not enough to clear the vines away.
The next plan they concoct involves a system of mirrors reflecting the sunlight from the upper level down the stairs. Olga starts to search the wreckage (a scavenger test) and finds a mirror that can be cleaned to reflect a decent amount of light.
Turn 9
Lagos tries to use the tiny mirror from his criminal tool supplies to redirect the light, but the resulting beam is little more than an irritant for the vines. Then he hits upon the idea of polishing up Olga’s armor to reflect some light. Initially, The GM calls for a Peasant test, but Paul narrated his way to an Alchemist test instead by concocting a chemical polish from his supplies. The test passed and gave a reflective sheen to Olga’s armor — with the caveat that the GM may decide the armor is tarnished again at any point, regardless of a twist (like snuffing candles).
It’s at this point that the party realizes they’re going to need a lot of mirrors to navigate a spiral staircase. Orrin suggests an alternative: they douse some rags and carpets from the parlor with fuel and set them alight after tossing them onto the vine wraiths in the path. The vines momentarily recoil long enough for the party to trample through the burning rags. A Good Idea!
Olga’s Instinct
Once again amongst the Company of the Swift Wing, Olga decides to trigger her instinct and relay the story of her own grand accomplishments within the party, rallying the Striders to her banner. It doesn’t go so well. Velkethyr has his doubts about the party’s progress, but he does send along a few strong striders to reinforce the party. Meanwhile, some amongst the striders continue to conspire about sending word back to Feudor about Olga’s whereabouts (a “trouble down the line” kind of twist.)
Dusk arrives. The Company of the Swift Wing secures their work, packs up and descends to the earth. They advance well ahead into the castle’s path to find the new camp that has been set up by the ground team.
Camp Phase
The Swift Wing striders have located a source of fresh water near the new camp. Orrin uses his instinct to make a map of their progress. Lagos uses his instinct to fashion some special chemical torches that will do a better job of warding off the vines. The party’s two checks are burned on recovery — Lagos treats his injury successfully, and Olga remains Angry.
Adventure Phase
Turn 1
Come daylight, the party must ascend again to reach the castle. The map cannot be used to fast travel, as they are in a totally different part of the Lordrek Forest now. Lagos takes the lead on this roll and succeeds. Najee remains behind in the camp.
Turn 2
The party and Velkethyr agree that they need to climb the Pearl Tower and reach the dread instrument which Najee described. That way at least they can change the course of the castle before it drifts into Mordeth.
The party uses the map to reach the parlor where the battle took place earlier. Entering from the east, there are two archways leading south, a set of stairs leading up at the far side of the room, and a spiral staircase worked into a stout column in the center of the room. Arched windows are set high in the walls and let dim light stream in — evidently the orcs didn’t care for the light and nailed scrounged-up coverings over them.
They debate tearing down the coverings to let the light in, but instead, they decide to set an ambush and hopefully use them to blind the orcs. They’ll need some way to lure any orcs above into the ambush.
Orrin decides to feign an interrogation of Najee loudly at the bottom of the stairs, hoping that the orcs will hear and investigate. If Wog should hear and think that Orrin is still his friend, more’s the better.
Except… this is a Manipulator versus test. The amount of dice rolled by the opposition is cause for concern amongst the party — 7 successes. Orrin fails.
Turn 3
As they continue their mock argument at the bottom of the stairs, they are too distracted to notice the first of the loud clanging noises from the stairwell. Soon the sound grows louder, and they realize something heavy is bouncing toward them. A wicked bomb of orc manufacture! They scatter, but to reach safety in time is a Health test for all present. Olga and Lagos pass their test. Orrin is hit by the rusty shrapnel! The underhanded orcs have poisoned the metal shards, and Orrin is made sick. But hey, at least he got that fail he needed to advance his Health!
As luck would have it, Orrin has been hanging on to a single draught of Sovereign Remedy. There's no better time than this to pop the cork and guzzle that potion down, curing the ailment!
Turn 4 — GRIND
After the deafening boom, there is silence. The party hopes that if they keep quiet, the orcs will come to loot the bodies. They stealthily take up positions or feign injury and wait. Lagos readies a smoke bomb.
Long moments of silence pass. Lagos passes a Scout test, and just in the nick of time, he hears not the winch of a crossbow but its trigger! He tosses the smoke bomb to save himself. A bolt sinks into the stone beside his head. They pull the curtains down from the windows, but the room is now filled with smoke, meaning the orcs don’t suffer their penalty until round 2 of the conflict that ensues.
Turn 5
The party has some options. They could attempt to pin the orcs in the stairwell and drive them back into the upper levels. They could flee back to the engine room and reinforce their number with the Swift Wing striders. Or they could stand and fight, in a Kill conflict. The GM notes that they got off easy in the compromise on the last Kill conflict, and that luck will not hold forever. Undaunted, they decide that the Pearl Tower must be taken, and a Drive Off would only delay the inevitable (or lead to a stronger orc force). They resolve to stand and fight.
The party rolls poorly on disposition for a total of 6 with some rewards sunk in. The orcs start with a disposition of 8.
The conflict is hard fought. The opposition, it turns out, is a mere three orcs — one elite Nature 5 orc with a crossbow, and two others armed with pole-arms. Ranged weapons with first strike (bows and thrown weapons) are negated in the first round due to the smoke bomb.
Things do not go well. In the first three rounds, the orcs roll hot and manage to deal serious damage without losing a single point. In the fourth round, Olga — having thrown her spear and armed now with a shield — is the only one remaining to test. The actions are revealed, and Olga is playing a Defend — the orcs have a Feint.
In a moment of dumb luck, the orcs’ Feint roll comes up with zero successes. Everyone at the table cheers!
Inch by inch, they manage to snatch victory from the jaws of defeat with well-placed maneuvers and defends. They manage to bring the entire party back into the fight, but the striders sent to accompany them are lost.
The battle ends with a major compromise.
Turn 6
The elite sniper orc, who the party thought was dead, lies slumped against the chamber’s central pillar. He lights the fuse on another bomb. A chain reaction with all his other bombs obliterates the central column and catches the party in the explosion. Massive Collateral Damage is the compromise, and the party must now roll to avoid injury in the blast. All three fail and become injured.
(After this incredibly epic and protracted fight, we decide to call an end to the session and hand out rewards.)
Thus ends Part I of the actual play! Stay tuned in the coming weeks for the (potentially) thrilling conclusion. This time around I will be experimenting with some recording techniques so we can really get into the nitty-gritty of each conflict.
chaos reigns
lord mordeth
"Lagos" by Paul O'Connell
"Ardmor" and "Queen Olga" by Matt Gibeault